Monday, July 4, 2016

Sticky captions in PicsPro slideshow


PicsPro version 5.3.2 is now available on Google Play.

This new release allows Sticky captions during slideshow. This new feature allows you to control if the photo captions are displayed or not in slideshow mode.

To enable this feature, go to the app's Settings, tap on Photo Browsing, then scroll down to the Slideshow section, where you can enable or disable the Sticky captions option.


Sunday, May 8, 2016

Major changes in Google's Picasa Web API

PicsPro version 5.3.0 was released today following a series of major changes in Google's Picasa Web API.
You can read more about these API changes on the Google Photos blog, as well as on the Picasa Web API Google group.

The new release has discontinued the Public Search feature, since it's no longer supported by Google.
Instead, we are offering a new feature called Recent, which displays your most recent uploads to Google Photos.

Saturday, March 12, 2016

Flippr for Flickr version 2.0.4

A new version of Flippr for Flickr was released today.
This release fixes an SSL issue following a change in Yahoo's Flickr API.

As usual, you can download the latest release from Google Play or Amazon App Store.
Get it on Google Play
Appstore-badge-black

Tuesday, January 26, 2016

Flippr for Flickr 3.0.3 fixes group list refresh issue

A new version of Flippr for Flickr was released today fixing a refresh issue in the Groups section.


Sunday, June 14, 2015

Upload to collaborative albums in PicsPro

Starting with version 4.6.8. PicsPro allows you to upload to a "collaborative" album created by another user.

To upload to a collaborative album:

1. From the sliding menu, select "Contacts". The app will show you the contacts you flagged as "favorite" on your phone. (You can show all contacts by clicking on the funnel icon in the top-right).
2. Tap on the contact who shared a collaborative album with you.
3. The app will show a list of albums that are either public or shared with you.
4. The albums to which you can upload ("collaborative albums") are shown with a "+" icon in the bottom left - this means you can add photos. See the + symbol near the camera icon below.


5. Tap on the album. You will be taken to the thumbnail view.
6. In the thumbnail view, you will see an "Add" option in the top-right menu. Depending on your phone's resolution and orientation, this may be either a "+" sign or the text "Add" in the overflow menu.


7. Tap on the Add option. This will open your local photo app (ex. Gallery or Google Photos or any app capable of providing photos). You can long-press to multiselect, then press open to confirm. 


8. The selected pics will be uploaded to the collaborative album. You will see an upload notification (upwards pointing arrow) in the notification area. You can drag-down that icon to see more info.
9. Once uploaded, the pics will appear in the target album.

Sunday, February 22, 2015

Google 2 step verification with PicsPro for Picasa

By default, PicsPro for Picasa uses the Google accounts and the authentication mechanism of the phone.
However, if you enabled "2-step verification" to your Google account, things can get a bit more complicated.

Here are two ways to use an account with 2-step verification in PicsPro.

Option 1: Using a "built-in" account

In the Web Albums section, press Refresh in the top-right menu
The Android OS will show the screen below. Press "Try again".


You will be prompted to re-type your password. Use your normal Google password and press the
"Sign in" button.

Android will not be able to authenticate yet due to the 2-factor verification and it will show the screen below. Press "Next".

You will receive a verification code through SMS. Enter this code in the screen below and press "Next".


From now on, your Google account will work properly with PicsPro for Picasa.

Option 2: Using a non built-in account

In PicsPro, go to the app's Settings -> Accounts and deactivate the "Use phone's accounts" option.


You will be presented with the regular Google login screen. Type your email and password and press "Sign in".

Google will send you a verification code by SMS. Enter it in the next screen.


Google will prompt you to allow PicsPro to access your photos. Press "Accept".


And that's it! From now on, you can use your 2-step verification account with PicsPro for Picasa.


Saturday, September 13, 2014

Chromecast Support in PicsPro for Picasa

Starting with version 4.5.1, PicsPro for Picasa includes Chromecast support for full screen online media.
To use the Chromecast functionality, please read the steps below.

1. Make sure your Android device and your Chromecast are on the same WiFi network, otherwise the Chromecast cannot be detected.

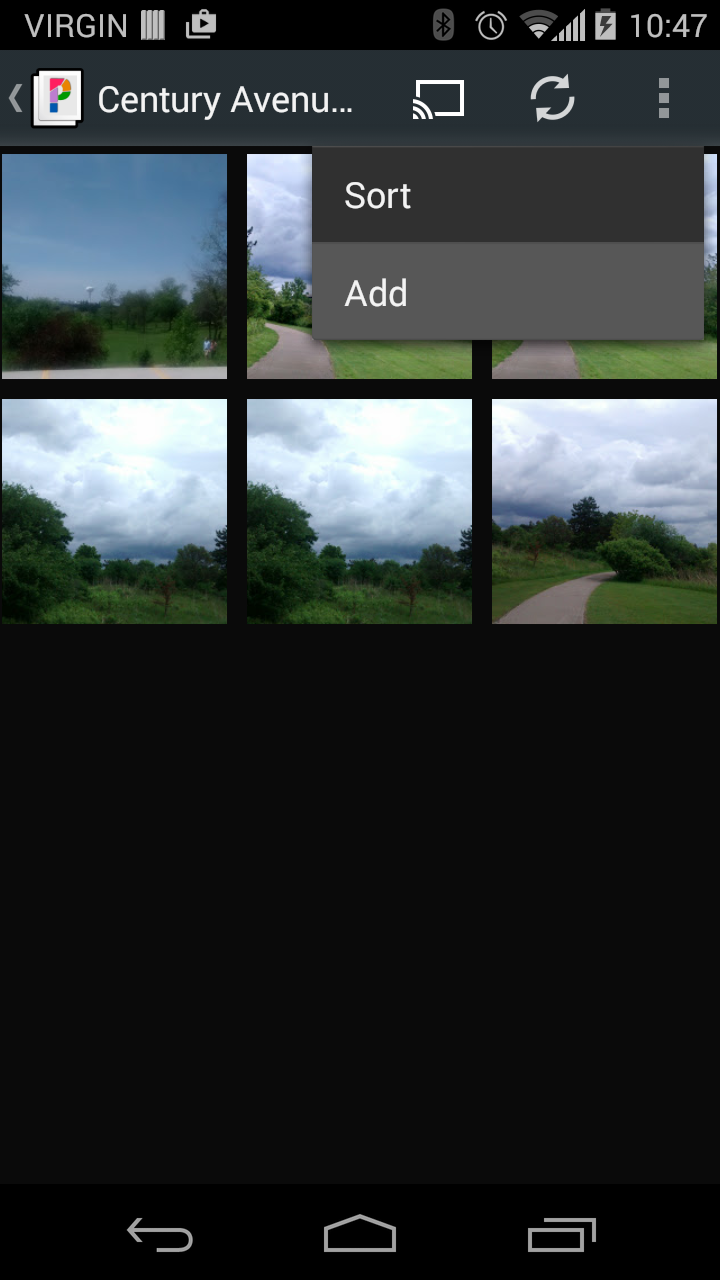
2. Once the Chromecast device is detected, you will see a Chromecast icon in the top-right menu of any online PicsPro section, as shown below.


3. Tap on the Cast icon and you will be prompted to select a Chromecast device. In this case, I have only one Chromecast device called "Living room"


4. The app will connect to your Chromecast device. This may take a couple of seconds. Once connected, the Cast icon will be displayed with a white fill, as shown below.


5. As mentioned before, only online full screen media will be "chromecasted". If you are not in a full screen view, you have to navigate to one. 
Displaying local media is not possible at this time.

6. Online Picasa Web videos can also be played to the Chromecast. Just press the big "play" button and the video will start playing through your Chromecast. While the video is playing, a "control box" like the one below will be displayed, allowing you to pause or stop the video.


While playing videos, you can adjust the audio volume by using the "volume up" and "volume down" buttons on your device.

7. The online media (photos or videos) will continue to be displayed when you switch to another app on your Android device. A Chromecast icon will be displayed in the notification area as long as you are connected.
By dragging-down that notification and tapping on it, you can change the audio volume or disconnect from Chromecast.


If the volume is too low, you can further increase it by using the remote control of your TV (or the device to which your Chromecast is connected).

Happy Chromecasting!